Last updated:
Disclosure: As an Amazon Associate we earn from qualifying purchases. This does not change what we recommend. See our affiliate disclaimer.
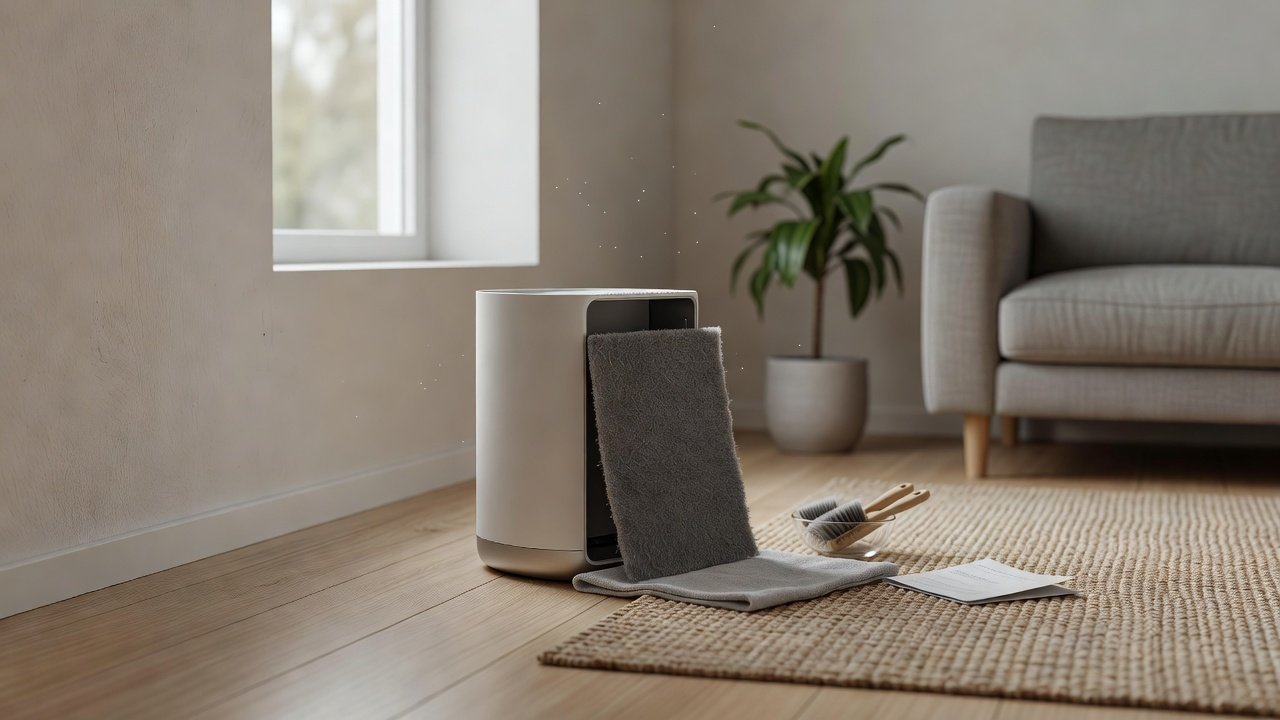
A carbon pre-filter is a thin, usually black or gray sheet that sits in front of the main filter. It catches hair, lint and larger dust, and the carbon in it can adsorb some odors. Because it is the first line of defense, it gets dirty first, and cleaning it correctly protects the main filter and keeps airflow strong. Cleaning it incorrectly can ruin it or leave it damp and smelly.
This guide explains how to tell whether your pre-filter can be vacuumed, washed or only replaced, how to clean it step by step and when to swap it. Always follow your manual, because pre-filter materials differ. We have not tested these products ourselves, and we do not recommend specific products.
Usually fine
- Vacuuming with a soft brush
- Gentle tapping outdoors
- Replacing on the manual’s schedule
Usually not fine
- Soaking a non-washable sheet
- Scrubbing hard or using solvents
- Reinstalling while damp
Key Takeaways
- Check your manual to see whether the carbon pre-filter can be vacuumed, washed or only replaced.
- Vacuum gently with a soft brush; wash only if the manual allows and dry completely before reinstalling.
- Cleaning removes dust but does not renew spent carbon; replace if odors return.
- Check every few weeks, and more often with pets, smoke or cooking.
- A damp pre-filter can smell and encourage mold, so never reinstall it wet.
A Realistic Cleaning Session
Set aside ten to fifteen minutes. Unplug the unit and place a towel or sheet on a table. Open the cover and slide out the pre-filter, noting how it sits. Vacuum the front and back with a soft brush attachment, using slow, light strokes. If hair is stuck, lift it with your fingers or a lint roller. Inspect the pre-filter against a light: if you can see through most of it, it is in decent shape, and if it looks solid gray or black, it needs replacement or washing if allowed.
While the filter is out, wipe the compartment with a dry cloth, vacuum loose dust with a brush attachment and inspect the main filter for damage. Reinstall everything in the correct order, close the cover and plug the unit back in. Run it for a few minutes and listen for unusual noises.
Washing Rules, If Your Manual Allows It
Use lukewarm water, never hot. Rinse from the clean side to the dirty side to push dust out rather than deeper in. Avoid soap unless the manual allows it, because residues can attract dust and cause odors. Do not wring or twist, which can deform the mesh. Gently press out water with a clean towel, then air-dry.
Keep a spare pre-filter if the model allows. You can swap in a dry one while the other dries, so the unit is never running without protection. If your pre-filter is part of the main filter assembly, follow the manufacturer’s instructions and do not separate parts that are not meant to be separated.
Safety, Pets and Allergies
If you are sensitive to dust, wear a mask when cleaning the pre-filter and do it outdoors or near an open window. Ask someone else to do it if the dust triggers symptoms. Keep pets away while the unit is open. Dispose of vacuum bag contents promptly and wipe surfaces afterward. This article provides general information and is not medical advice. If you have a respiratory condition, ask your clinician what steps are right for you.
Common Mistakes With Carbon Pre-Filters
The first mistake is assuming a carbon pre-filter is a permanent part. Even a washable mesh wears out, and a carbon sheet is consumable. The second is cleaning too aggressively, with hard scrubbing, hot water or detergents. The third is reinstalling while damp, which encourages mold and odors. The fourth is skipping it entirely, which sends dust straight to the main filter and shortens its life. The fifth is using an off-brand pre-filter that does not seal, so air takes a shortcut.
Avoid these by following the manual, being patient with drying and keeping a spare. If you cannot find a replacement pre-filter, contact the manufacturer or check authorized retailers before buying an unverified substitute.
Cost and Value
Pre-filters are one of the cheapest parts to maintain and one of the most useful. A clean pre-filter keeps airflow strong and may extend the life of the more expensive main filter. If your model uses a disposable pre-filter, include its price in your cost of ownership. We do not list prices, so check the current price from the manufacturer or a trusted retailer and compare it with the cost of replacing the main filter early.
Verify the exact part number for your model, because pre-filters often look alike but fit different units. Keep the manual and a photo of the part label on your phone.
Final Checklist
Check the manual for cleaning rules. Vacuum gently. Wash only if allowed and dry completely. Replace if torn, saturated or smelly. Keep a log and a spare. Check the main filter while you are there. Verify specifications for your model on the manufacturer’s page, because designs change and guidance differs.
Air Purifiers to Compare
The table below lists purifiers from our affiliate partner. Compare pre-filter design, filter access and replacement cost when you shop.
Check What Type You Have
Some pre-filters are washable mesh screens, some are thin carbon-impregnated sheets meant to be vacuumed, and some are disposable. Look for a washing symbol or a statement in the manual. If the manual says “do not wash,” vacuum only. If it says washable, follow the water temperature and drying guidance exactly.
If you are unsure, vacuum gently with a soft brush attachment. It is the safest way to remove surface dust and hair. Carbon sheets often hold odor-adsorbing carbon that water or scrubbing can damage.
Step-by-Step Cleaning
Unplug the unit and open the cover. Remove the pre-filter, noting how it is oriented. Take it outdoors or over a sheet. Vacuum both sides with a soft brush attachment, using light strokes. Tap the edge gently to dislodge dust. If the manual says washing is allowed, rinse under lukewarm running water, do not scrub, shake off excess water and let it air-dry completely in the shade. Do not use a hair dryer.
Wipe the compartment with a dry cloth, reinstall the dry pre-filter in the correct orientation and close the cover. A damp pre-filter can smell musty and encourage mold, so be patient with drying.
| Pre-filter type | Vacuum | Wash | Replace when |
|---|---|---|---|
| Washable mesh | Yes | Yes, if manual allows | Torn or deformed |
| Carbon-impregnated sheet | Yes | Usually no | Odor returns or heavily soiled |
| Disposable foam or fabric | Light vacuuming | No | Per manual schedule |
How Often to Check and Clean
Check the pre-filter every two to four weeks at first, then adjust. If you see a visible layer of dust or hair, clean it. Homes with pets, smoke, cooking or construction dust may need weekly checks. A clean pre-filter helps the main filter last longer and keeps airflow strong. A pre-filter that is only lightly dusty can be left, but do not let it clog.
Mark the date you cleaned it. Over time you will learn the rhythm for your home.
Why Carbon Pre-Filters Behave Differently
A pre-filter with carbon does two jobs: it catches coarse particles and adsorbs some odors. The carbon layer can saturate, which means it stops adsorbing even though it looks fine. Cleaning removes dust but does not renew the carbon. If odors return after cleaning, the carbon is likely spent, and the pre-filter should be replaced.
Washing a carbon sheet can wash away or clog carbon particles and reduce effectiveness, which is why many manuals say vacuum only. Follow the manual closely.
Drying and Reinstalling
If you wash a pre-filter, shake off water and let it dry in a shaded, ventilated spot until it is completely dry, which can take a day or more. Do not use heat, since it can warp the frame or damage the mesh. Check that the pre-filter feels dry all the way through before you put it back. A damp pre-filter can smell and may promote mold in the unit.
Reinstall it with the correct side facing out. If the manual shows arrows or labels, follow them. Close the cover and make sure it clicks.
Troubleshooting Odors After Cleaning
If a musty smell appears, the pre-filter may still be damp, or the room may have moisture. Replace the pre-filter, dry the compartment and check the room. If smoke or cooking odors persist, the carbon in the pre-filter and main filter may be saturated. Replace them and ventilate. If the odor seems chemical or burnt, stop using the unit and contact the manufacturer.
When to Replace Instead of Clean
Replace the pre-filter if it is torn, warped, permanently stained, smells even after cleaning, or has lost its odor-adsorbing ability. Replace it if the manual says it is disposable. Use filters made for your model to ensure a proper fit. A poorly fitting pre-filter can let dust bypass the main filter.
How to Choose
- Look for a pre-filter that is easy to remove and clean.
- Check whether the pre-filter is washable or disposable.
- Compare smoke CADR, room size and filter cost.
- Check carbon quantity if odors matter.
- Avoid ozone-generating modes; the EPA advises against ozone-emitting air cleaners.
Do
- Match the unit’s rated coverage to your room first
- Run it consistently, not only when the air feels bad
- Leave space around the unit for airflow
- Replace filters on the maker’s schedule
Don’t
- Do not buy on looks or price alone
- Do not block the intake or exhaust
- Do not skip filter changes
- Do not expect a purifier to fix every source of pollution
Honest Limits
- This guide uses manufacturer information and public guidance from the EPA and AHAM, not our own lab tests.
- Features and room ratings change between model years, so confirm on the listing before you buy.
- A purifier is not a medical device and does not replace medical advice or treatment.
Who Should Skip This
When to See a Professional
Frequently Asked Questions
Can I wash a carbon pre-filter?
Only if the manual says so. Many carbon sheets should be vacuumed, not washed.
How do I dry a pre-filter?
Air-dry in a shaded, ventilated spot until completely dry. Do not use heat.
How often should I clean it?
Check every two to four weeks and clean when visibly dusty, more often in homes with pets or smoke.
Why does the smell return after cleaning?
The carbon may be saturated. Replace the pre-filter or filter, and check for moisture or sources.
Can I run the purifier without the pre-filter?
It is not recommended, because dust will load the main filter faster.
Bottom Line
Vacuum a carbon pre-filter gently, wash it only if the manual allows and make sure it is fully dry before reinstalling.
Replace it when it is torn, heavily soiled or no longer helps with odors.
Related reading: sens,fan,bed
Sources: EPA, Guide to Air Cleaners in the Home; AHAM Verifide.