Last updated:
As an Amazon Associate we earn from qualifying purchases. This does not change what we recommend. See our affiliate disclaimer.
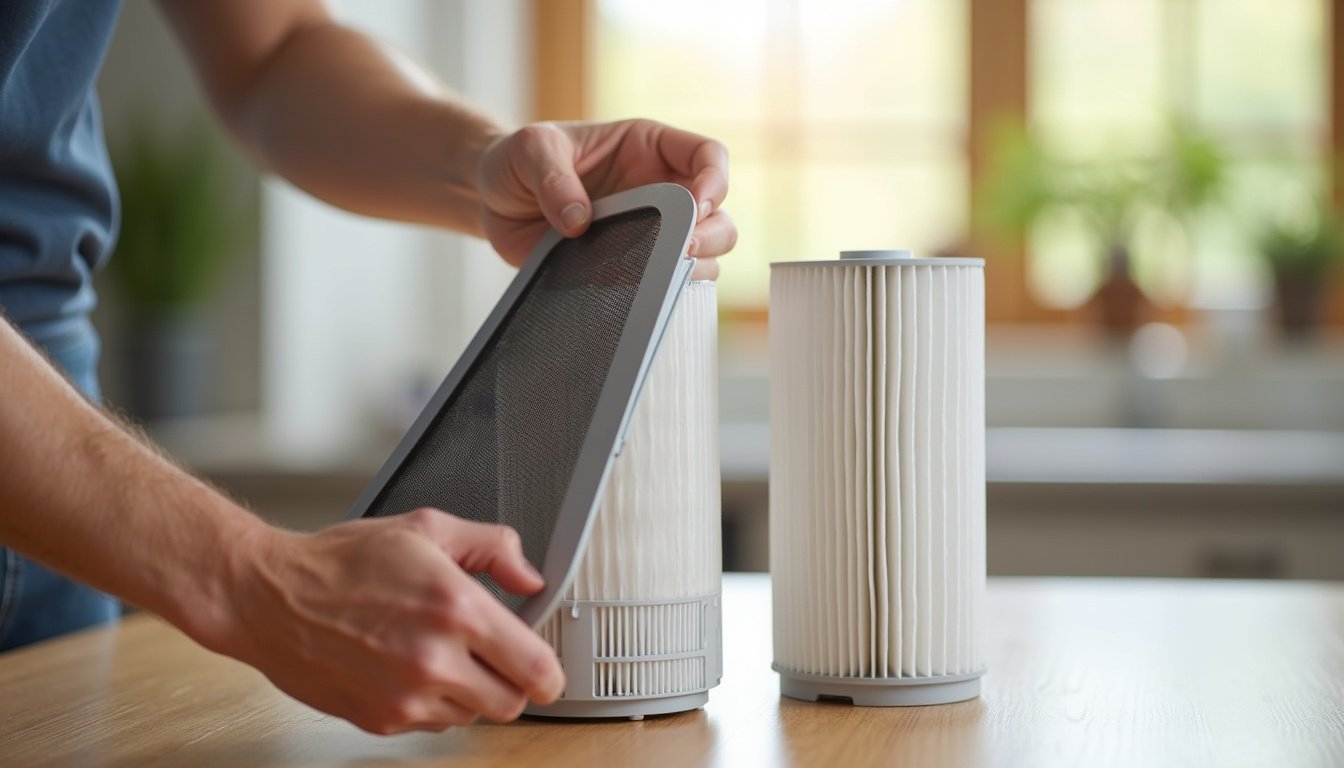
A pre-filter is the simplest part of an air purifier: a sheet of mesh or foam that catches hair and lint before the HEPA stage. It should slide, snap or wrap into place in seconds. When it will not, when it bulges, gaps at a corner, pops out of its clips or sits proud so the door will not close, the whole filter change stalls on the cheapest part in the box.
A pre-filter that will not fit has one of five causes, and a minute of looking tells you which. The commonest is the wrong part: a sibling model’s pre-filter that differs by millimeters, or a generic sold as compatible. The second is orientation: many pre-filters have a tab, notch or lip that goes one way, or wrap around a cylindrical HEPA with an overlap that must sit in a channel. The third is the pre-filter itself: a washable mesh dried on a radiator that shrank or curled, a foam that swelled while damp, or a frame bent in storage. The fourth is the HEPA beneath it, not fully seated or fitted backwards, so the pre-filter has nowhere to sit. The fifth, least common, is the housing: snapped clips, a door warped by heat or a drop, or a slipped gasket. None of the fixes involves forcing. A pre-filter forced into place tears, gaps so hair reaches the HEPA, or stops the door latching so the unit beeps or will not start.
In short: check the part number and the orientation first, then whether the mesh has shrunk or curled, then whether the HEPA under it is seated. Never force it.
Maker manuals specify pre-filter part numbers per model, show orientation with tabs, arrows or notches, and instruct that washable pre-filters be air dried flat rather than heat dried. They also describe door interlocks that stop the unit when the filter assembly is not seated.
This guide is research-based, drawn from maker manuals and parts documentation and small appliance practice. We have not tested the units in the comparison table and quote no prices or ratings. Nothing here is medical advice.
Likely causes
- Wrong part: a sibling model’s pre-filter or a generic that is a few millimeters off
- Wrong orientation: tab, notch, lip or overlap in the wrong place
- Shrunk, curled or swollen mesh or foam after washing and heat drying
- HEPA beneath not fully seated or fitted backwards
Less likely but real
- Snapped clips, a warped door or a slipped gasket on the housing
- A pre-filter frame bent in storage or shipping
- Shipping plastic or a cardboard insert still on the HEPA
- A new HEPA of a different thickness from a third-party supplier
Key Takeaways
- Check the part number against the model label on the unit; sibling models often use pre-filters that differ by millimeters.
- Pre-filters have an orientation: look for a tab, notch, arrow, lip or overlap channel before pressing it in.
- Washable pre-filters that were heat dried shrink or curl; air dry flat, and flatten a curled one under a book overnight.
- A pre-filter that will not sit is often a HEPA beneath it that is not fully seated or is backwards.
- Never force a pre-filter; a torn or gapped one lets hair reach the HEPA and a proud one stops the door latching.
- Snapped clips and warped doors are housing faults; the maker sells doors and clips for many models.
- A unit that beeps or will not start after a filter change usually has a door that is not latched because the stack is too tall.

Purifiers With Simple, Forgiving Pre-Filters
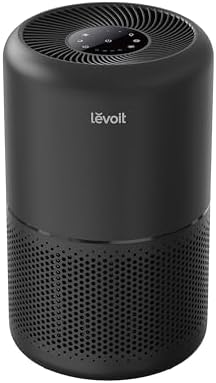
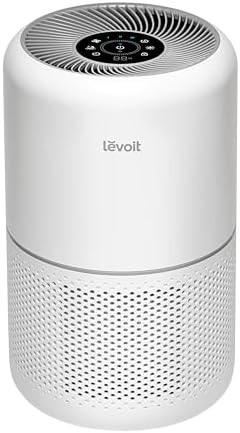
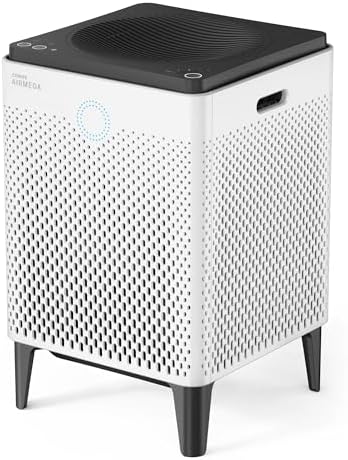
These widely reviewed units use pre-filters that wrap, snap or drop in with obvious orientation and tolerate real-world handling, and makers that sell the pre-filter as a clearly numbered part. Compare the maker-listed CADR against your room and note the pre-filter part number when you buy.



How This Guide Approaches the Question
We looked at how pre-filters mount across the common designs, the ways a part, its orientation, its condition, the HEPA beneath it or the housing can stop it fitting, and how to correct each without damage. Product details in the table come from maker specifications.
The rule is that a pre-filter should go in with almost no effort. Resistance means something is wrong with the part, the direction, the mesh or what is under it, not that more force is needed.
How Pre-Filters Mount
Pre-filters attach in a handful of ways, and each has its own way of not fitting.
| Mounting style | How it fits | Common fitting problem |
|---|---|---|
| Wrap-around mesh on a cylindrical HEPA | Hook-and-loop or an overlap in a channel | Overlap outside the channel; mesh shrunk so it will not meet |
| Flat sheet behind a grille | Drops into a recess; grille snaps over | Sheet oversized or curled; grille clips broken |
| Framed panel | Slides into rails or clips | Wrong size; frame bent; backwards |
| Foam sleeve or pad | Stretches over or presses into a recess | Swollen when damp; torn; wrong thickness |
| Bonded to the HEPA | Not separate | Trying to fit a separate pre-filter to a unit that does not take one |
| Magnetic or clip-on panel | Magnets or tabs locate it | Tabs misaligned; magnets dislodged |
Knowing the style tells you where to look: a wrap-around that gaps is usually an overlap problem or shrinkage; a flat sheet that bulges is oversized or curled; a framed panel that will not slide is the wrong part or backwards.
Wrong Part
Makers sell pre-filters by part number, and sibling models in a range often take parts that look identical but differ by a few millimeters or by the position of a tab. Replacement kits sometimes include several pre-filter sizes for different models, and generic filters sold as compatible may match the HEPA but not the pre-filter. Find the model number on the label on the base or back of the unit, compare it with the part number on the pre-filter’s packaging or the maker’s parts page, and if they do not match, stop fitting and reorder. A near-miss pre-filter forced in gaps at the edges and lets hair straight through to the HEPA.
Wrong Orientation
Pre-filters are rarely symmetrical. A rectangular sheet may have one long edge with a lip, a tab at one corner, a notch for a sensor port or a cutout for a handle. Cylindrical wrap-arounds have a defined overlap that sits in a channel or against a seam, and some have a top and bottom that differ in diameter. Framed panels often carry an arrow for airflow direction or a tab that engages a slot. Rotate the pre-filter through its orientations rather than pressing harder; one of them drops in. The manual’s filter diagram shows the intended position, and the old pre-filter, if it is still around, shows where its wear marks and dust face were.
- Look for a tab, notch, lip, arrow or cutout and match it to the housing.
- On wrap-arounds, find the overlap channel or seam and start the mesh there.
- On framed panels, the airflow arrow points into the unit, toward the HEPA.
- If the pre-filter is a different size top and bottom, try it the other way up.
- Compare with the old pre-filter’s dust face: dust side faces the intake.
Shrunk, Curled or Swollen
Washable pre-filters are nylon mesh or polyurethane foam, and both react to heat and moisture. A mesh dried on a radiator, in a dryer or in direct sun shrinks and curls at the edges so it will not reach its clips or lie flat; a foam pad left damp swells and will not press into its recess, then shrinks and hardens as it dries. The manual’s instruction to air dry flat exists for this reason. A curled mesh can often be flattened under a heavy book for a day, and a slightly shrunk wrap-around can sometimes be eased back into its channel while slightly damp and left to dry in place. A mesh that has shrunk more than a few millimeters, or a foam that has hardened or crumbles, is finished and is replaced.
| Condition | Cause | Fix |
|---|---|---|
| Edges curled, will not lie flat | Heat drying or sun | Flatten under a book 24 hours; air dry flat in future |
| Wrap-around will not meet at the overlap | Shrinkage from heat | Fit while slightly damp; dry in place; replace if gap remains |
| Foam will not press in | Swollen while damp | Dry fully flat; refit |
| Foam hard, cracking or crumbling | Age, heat, detergent | Replace |
| Mesh torn at a clip | Forced fitting | Replace; tears spread |
| Frame bent | Storage or shipping | Gently straighten on a flat surface; replace if cracked |
The HEPA Beneath It
A pre-filter sits on or against the HEPA, and if the HEPA is not fully home, the pre-filter has nowhere to go. Common causes are a HEPA fitted backwards, a HEPA with shipping plastic or a cardboard insert still on it, a HEPA from a third-party supplier that is a few millimeters thicker than the original, or a HEPA whose gasket has folded under during fitting. Pull the pre-filter, press the HEPA firmly and evenly into its seat, check that any arrow points into the unit and that its gasket lies flat, then try the pre-filter again. If the HEPA itself sits proud, that is the part that does not fit, and the pre-filter is the messenger.
The Housing
When the part is right, the orientation is right, the mesh is flat and the HEPA is seated, what remains is the housing. Pre-filter clips are small plastic tabs that snap off when a grille is pried wrongly; a grille or door can warp if the unit sat near a heater or was dropped; a gasket around the filter door can slip and take up the space the pre-filter needs. Look for missing tabs, a door that no longer sits flush when empty, or a gasket that is loose. Many makers sell doors, grilles and clips as parts, and a door that will not latch because a clip is gone is a cheap fix. A unit with a door interlock will beep or refuse to start until the door latches, which is often how a tall filter stack or a warped door announces itself.
| Housing problem | Sign | Fix |
|---|---|---|
| Snapped clip or tab | Pre-filter pops out on one side | Order the grille or door as a part; do not glue a tab |
| Warped door or grille | Door will not sit flush even empty | Replace door; move unit away from heat |
| Slipped gasket | Pre-filter has no room; door stiff | Reseat gasket in its groove |
| Debris in the recess | Pre-filter sits proud at one point | Vacuum the recess |
| Door interlock not engaging | Unit beeps or will not start after change | Reduce stack height: check HEPA seating, correct pre-filter |
A Fitting Routine That Works
A pre-filter change takes a minute when done in order: unit unplugged, HEPA checked and seated, pre-filter oriented by its tab or overlap, pressed home with fingertips around the edge, door closed and latched, unit restarted. The same order diagnoses a pre-filter that will not fit, because each step rules out a cause before the next.
Worked example: a new pre-filter for a tower unit will not reach its clips on one side. It is the right part number and the right way round, but it was dried on a radiator after its last wash and has curled. A night under a heavy book flattens it; it clips in the next morning. The household now dries it flat on a towel.
How to Fix a Pre-Filter That Will Not Fit in 6 Steps
- Unplug the unit and compare the pre-filter’s part number with the model label; if they differ, stop and reorder the correct part.
- Look for a tab, notch, lip, arrow or overlap and rotate the pre-filter until it matches the housing, with the dust side toward the intake.
- Check the pre-filter is flat and full-sized; flatten a curled mesh under a book overnight and replace one that has shrunk, hardened or torn.
- Remove the pre-filter and check the HEPA beneath: unwrapped, arrow inward, gasket flat, pressed fully home.
- Inspect the housing for snapped clips, a warped door, a slipped gasket or debris in the recess, and order parts or reseat as needed.
- Press the pre-filter home with fingertips, latch the door, restart, and check that airflow is normal and the unit does not beep.
Do and Do Not
Do
- Match part numbers to the model label.
- Find the orientation mark before pressing.
- Air dry washable pre-filters flat.
- Seat the HEPA first, then the pre-filter.
- Order a replacement door or grille for snapped clips.
Do not
- Do not force a pre-filter into place.
- Do not heat dry mesh or foam.
- Do not trim a pre-filter to make it fit.
- Do not glue snapped clips.
- Do not run the unit with a gapped or torn pre-filter.
Who Should Skip This
If the part number on the pre-filter does not match the model label, skip every other step; no amount of orientation fixes a part made for a different model, and the answer is the right part.
If the HEPA sits proud of its seat, skip the pre-filter entirely until the HEPA is sorted: unwrap it, turn it the right way, flatten its gasket and press it home.
Honest Limits
- Mounting designs vary by model; the manual’s filter diagram overrides this guide.
- Part compatibility claims by third-party sellers are outside our knowledge; measure and compare.
- We did not test any unit or any pre-filter.
- Flattening a curled mesh works for mild curl only; shrinkage is permanent.
- Housing parts availability varies by maker and model age.
- Nothing here is medical advice.
When to See a Professional
Contact the maker for the correct pre-filter part number, for replacement doors, grilles or clips, and for a unit that will not start after a filter change with the door latched, which may be an interlock fault.
Use a small appliance technician for a housing repair you are not comfortable with, and never glue or tape a filter door, which has to open for every change.
Frequently Asked Questions
Why won’t my air purifier pre-filter fit?
One of five things: it is the wrong part for the model, it is the wrong way round, the mesh or foam has shrunk, curled or swollen after washing and heat drying, the HEPA beneath it is not fully seated, or the housing has a snapped clip, warped door or slipped gasket.
How do I know which way the pre-filter goes?
Look for a tab, notch, lip, cutout, arrow or overlap and match it to the housing; the dust side faces the intake and any airflow arrow points into the unit toward the HEPA. Wrap-around meshes start at the overlap channel or seam.
My pre-filter shrank after washing. Can I fix it?
Mild curl can be flattened under a heavy book for a day, and a wrap-around that barely misses its overlap can sometimes be fitted slightly damp and left to dry in place. Real shrinkage is permanent and the pre-filter is replaced.
Can I use a pre-filter from a different model?
Only if the maker lists it as compatible. Sibling models often use pre-filters that look identical but differ by millimeters or by tab position, and a near-miss gaps at the edges and lets hair reach the HEPA. Compare the part number with the model label on the unit and measure the old pre-filter before ordering.
Can I cut the pre-filter to make it fit?
No. Trimming removes the lip, tab or finished edge that holds it in place, leaves raw mesh that frays and sheds, and produces a part that gaps or falls out. A pre-filter that needs trimming is the wrong part.
Why does the pre-filter pop out on one side?
A clip or tab on the housing has snapped, the mesh has curled on that side, or the pre-filter is the wrong way round so its lip is not engaging. Check the clip first; makers sell grilles and doors as parts, and gluing a tab rarely holds. Then flatten the mesh and confirm the orientation.
The door won’t close after I fitted the new filters. Why?
The filter stack is too tall: the HEPA is not fully seated, is backwards, or still has shipping plastic or a cardboard insert; a third-party HEPA is thicker than the original; the pre-filter is oversized or doubled over; or the door gasket has slipped.
Why does the unit beep or refuse to start after a filter change?
A door interlock is not engaging because the door is not latched, usually because the filter stack sits proud. Check the HEPA is seated and the right way round, the pre-filter is the correct part and flat, and the door latches flush.
Does the pre-filter need to fit perfectly?
Yes, within reason. Its job is to stop hair, lint and large dust before the HEPA, and a gap at an edge is a bypass that loads the HEPA early. It should sit flat and reach every clip or edge with no bulge and no force.
How do I stop the pre-filter warping in future?
Rinse it in cool water without harsh detergent, shake off the excess, lay it flat on a towel to air dry completely, and refit it only when fully dry. Keep it away from radiators, dryers, hairdryers and direct sun.
Bottom Line
An air purifier pre-filter that will not fit is telling you one of five things: wrong part, wrong way round, shrunk or curled mesh, a HEPA beneath it that is not seated, or a housing with a snapped clip, warped door or slipped gasket. A minute of checking in that order finds the cause, and none of the fixes involves force. Match the part number to the model label, find the tab or overlap, flatten a curled mesh under a book, seat the HEPA first, and order a door or grille if a clip has gone.
Dry washable pre-filters flat and away from heat so the problem does not recur, and never trim or force a pre-filter; one that gaps or tears lets hair straight through to the HEPA, and one that sits proud stops the door latching and the unit starting.
Related reading: Can you wash a HEPA filter, How to clean air purifier pre-filter, Air purifier filter not fitting.