
Last updated:
Disclosure: As an Amazon Associate we earn from qualifying purchases. This does not change what we recommend. See our affiliate disclaimer.
Some air purifiers include a humidifier, which adds a water tank, a tray, a wick or evaporative filter and sometimes an ultrasonic plate. That extra function brings extra upkeep. Standing water and damp parts can support mold and bacteria if not cleaned regularly, and minerals from tap water leave scale or white dust. A simple routine keeps the unit safe and effective.
This guide covers the common steps. We have not tested these products ourselves, so follow the manual for your model, including which parts are washable, which cleaning agents are allowed and how often. Always unplug before cleaning and keep the electronics dry.
Regular care
- Empty and dry the tank often
- Clean the tank and tray on schedule
- Replace wicks and filters when due
Avoid
- Leaving stagnant water in the tank
- Using additives or essential oils unless allowed
- Wetting the electronics or the HEPA filter
Key Takeaways
- Combination units need regular water-side cleaning
- Keep HEPA and carbon filters dry
- Use the water type the manual allows and avoid additives
- Keep humidity around 30 to 50 percent
Descaling Safely
If the manual allows vinegar, use a diluted solution and follow the soak time. Rinse until no smell remains. Never mix vinegar with bleach or other cleaners. Wear gloves and ventilate. If the manual specifies a descaling product, use that.
Storage When Not in Use
Empty, clean and dry the tank and wick. Leave the lid off to air. Store in a dry place. Do not store with water in the tank. Before using again, clean and replace the wick if needed.
Safety and Electrical Care
Keep the base and power cord dry. Place the unit on a level surface away from outlets and electronics. Do not overfill. If water leaks into the base, unplug the unit and let it dry fully. Contact the manufacturer if it was affected.
Choosing Combination Versus Separate Units
A combination unit saves space but adds maintenance. Separate units allow you to place each where it works best and to clean them independently. Think about how much cleaning you are willing to do before you buy.
Hard Water Basics and Why It Matters Here
Hard water carries dissolved calcium and magnesium. In a humidifier it leaves scale on heating elements, wicks and ultrasonic plates and, in ultrasonic units, can release a fine white mineral dust into the air. If you see a chalky film on furniture near the unit, hardness is likely the cause. Your local water supplier can tell you the hardness, and distilled or demineralized water avoids most of the problem if the manual allows it.
Mold, Bacteria and the Case for Daily Habits
Standing water at room temperature is a good place for microbes to grow. Emptying and drying the tank daily, rinsing it with fresh water and refilling with fresh water each time makes the biggest difference. Do not top up old water. If the tank has a narrow opening, use a bottle brush to reach the corners. These daily habits matter more than occasional deep cleans.
Cleaning Order for the Whole Unit
Unplug. Empty the tank. Remove the tray, wick and any cartridge. Clean the water parts. Wipe the base and housing with a barely damp cloth. Inspect the HEPA and carbon filters and the pre-filter. Dry everything. Reassemble. Refill with fresh water. This order keeps water away from the filters and electronics and makes sure nothing is missed.
Humidifier Settings and Room Conditions
Keep humidity in the range of about 30 to 50 percent. Use the humidistat setting if the unit has one, and stop the humidifier when windows show condensation. In humid seasons, turn off the humidifier function and run the purifier alone. Do not place the unit where mist falls on furniture, books or electronics.
When Not to Use the Humidifier Function
Skip the humidifier function if humidity is already high, if the unit smells musty, if you cannot clean it regularly or if someone in the home has respiratory concerns and has been advised by a professional to avoid humidifiers. The purifier function can run on its own. When in doubt, ask a healthcare professional.
Keeping Filters and Wicks Organized
Label spare wicks and filters with the install date and keep them in sealed bags. Keep a note of which filters are for the water side and which are for the air side. Store spare parts away from damp areas. A simple system avoids mix-ups and missed replacements.
Seasonal Humidifier Care
At the start of a heating season, clean and descale the water parts and replace the wick. At the end, clean, dry and store the parts separately. During the season, keep to the daily and weekly routine. This seasonal framing makes it easy to remember the big jobs.
Air Purifiers and Humidifiers to Consider
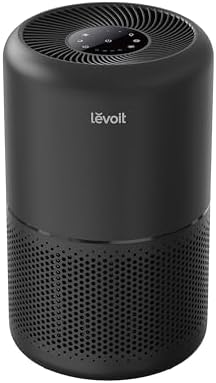
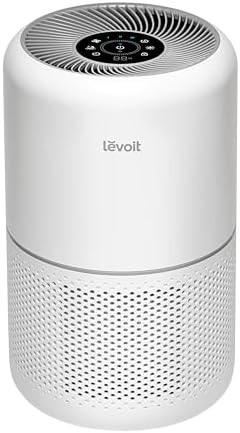
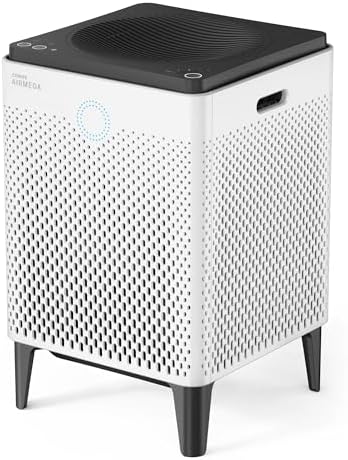
If you want both functions, consider whether separate units might be easier to maintain than a combination. These picks come from the Hostinger affiliate plugin. Specs change by model year, so confirm features, cleaning requirements and replacement costs on the product page.



Unplug and Separate the Water Side
Unplug the unit, remove the water tank and empty it. Take out the tray and the wick or humidifying filter. Keep the HEPA and carbon filters dry and away from water. Photograph the arrangement of parts to help you reassemble.
Clean the Tank and Tray
Rinse the tank with lukewarm water. Use a soft brush or sponge and mild soap if the manual allows, then rinse thoroughly. For mineral scale, the manual may allow diluted white vinegar for a short soak, followed by a thorough rinse. Do not use bleach or harsh chemicals unless the manual says so. Dry parts completely before reassembly.
Wicks and Humidifying Filters
The wick or evaporative filter collects minerals and can become stiff, discolored or smelly. Rinse it as the manual allows, or replace it on schedule, often every one to three months depending on water hardness. Never put a damp wick back into a closed unit for long periods.
Keep the Air Filters Dry
The HEPA and carbon filters should never be soaked. If water spills into the filter area, unplug the unit, remove and replace wet filters and let the housing dry. Wipe the housing with a barely damp cloth and mild soap, and dry the exterior.
Use the Right Water
Hard tap water leaves white dust and scale. Distilled or demineralized water, if the manual allows, reduces both. Do not add essential oils, scents or additives unless the manual explicitly says so. Change the water daily and do not top up old water.
Humidity Targets
Aim for relative humidity of about 30 to 50 percent. Higher levels encourage mold and dust mites, and lower levels dry the air. A hygrometer lets you check. If humidity climbs above 50 percent, reduce the output or turn the humidifier off.
Cleaning Schedule
Empty and dry the tank daily if you can. Rinse the tank and tray every few days. Do a fuller clean weekly. Descale monthly or as water hardness requires. Replace wicks and filters on schedule. Follow the manual if it gives different intervals.
Mold and Odor Signs
A musty smell, pink or black slime in the tank or visible spots on the wick are signs to stop and clean. Replace the wick, clean the tank and dry everything. If mold returns quickly, check humidity and consider using distilled water. Do not run the unit with visible growth.
Ultrasonic Plate and Mist Parts
Ultrasonic models have a plate that vibrates to create mist. Clean it with a soft brush or cotton swab and the cleaning solution the manual allows. Do not scratch it. Rinse thoroughly and dry. Mineral build-up here can reduce mist and cause white dust.
When to Replace the Unit
If parts are broken, the tank leaks, wicks are unavailable or the unit smells despite cleaning, replacement may be sensible. Consider separate devices, which are often easier to clean. Check the warranty and filter costs.
How to Choose
- Consider separate units for easier cleaning
- Check tank size and access
- Look for replacement wick and filter availability
- Match the CADR to the room size
Do
- Match the unit’s rated coverage to your room first
- Run it consistently, not only when the air feels bad
- Leave space around the unit for airflow
- Replace filters on the maker’s schedule
Don’t
- Do not buy on looks or price alone
- Do not block the intake or exhaust
- Do not skip filter changes
- Do not expect a purifier to fix every source of pollution
Honest Limits
- This guide uses manufacturer information and public guidance from the EPA and AHAM, not our own lab tests.
- Features and room ratings change between model years, so confirm on the listing before you buy.
- A purifier is not a medical device and does not replace medical advice or treatment.
Who Should Skip This
When to See a Professional
Frequently Asked Questions
How often should I clean the tank?
Empty and dry it daily if possible, rinse every few days and do a fuller clean weekly.
Can I use vinegar?
Only if the manual allows. Rinse thoroughly afterwards.
Why is there white dust?
Minerals in hard water. Use distilled or demineralized water if the manual allows.
Can I add essential oils?
Not unless the manual explicitly allows it.
Bottom Line
A purifier with built-in humidification needs regular water-side care: empty and dry the tank, clean it and the tray, replace wicks on schedule and keep the HEPA and carbon filters dry. Use the water type the manual allows, avoid additives and watch humidity so it stays in a comfortable range.
Related reading: sens,fan,bed
Sources: EPA, Guide to Air Cleaners in the Home; AHAM Verifide.