
Last updated:
Disclosure: As an Amazon Associate we earn from qualifying purchases. This does not change what we recommend. See our affiliate disclaimer.
Installing a new air purifier filter takes a few minutes, but small mistakes can reduce performance or cause noise. Unplug the unit, open the filter compartment, remove the old filter, take the new filter out of its packaging, check the order and orientation against the manual, seat it flat, close the cover until it clicks and reset the filter indicator if your model has one. If it does not fit or the unit makes odd noises, do not force it and check the model and part number.
We have not tested these products ourselves, so follow your manual. Nothing here is medical advice.
Do
- Unplug first
- Check order and orientation
- Remove all packaging
Avoid
- Forcing a filter
- Skipping the cover
- Forgetting to reset the indicator
Key Takeaways
- Unplug first
- Remove packaging
- Match order and orientation
- Reset the indicator
A Short Installation Checklist
Unplug the unit and place it on a stable surface. Open the compartment and remove the old filters in order, taking a photo to remember the arrangement. Check the new filter model against the manual. Remove all plastic. Slide the filters into place with arrows pointing the right way and ensure the edges sit flat. Close the cover until you hear or feel a click. Plug in and run the unit on a medium speed. Listen for rattles and check for air leaks around the cover. Reset the filter indicator per the manual and record the date. Dispose of the old filters and wash your hands. If something looks wrong, stop and recheck the diagram before continuing.
Tools You May Need
Most units need no tools. Some use screws. Follow the manual and do not open parts that are not meant to be opened.
Pet and Dust Homes
Replace filters sooner and clean pre-filters often.
Third-Party Filters
Check dimensions, seals and reviews.
Storing Spares
Keep them sealed and dry.
Testing Seal Quality
Hold a hand near the cover to feel for leaks.
Common Mistakes
Wrong order, missing plastic removal and unclosed covers are common.
Aftercare: Making a New Filter Last
After installation, give the unit clearance, keep the pre-filter clean and avoid running it in extremely dusty conditions such as during sanding. Mark the date on a calendar or set an app reminder. Check the filter visually every month. Replace on the manufacturer’s schedule or sooner after smoke events, renovation or heavy pet shedding. Keep the manual and a record of the model and filter numbers so you can reorder quickly. Store spare filters sealed in a dry place. If you notice reduced airflow, new noises or odors, recheck that the filter is seated and not blocked. Good habits save money and keep performance steady.
Mid-Cycle Checks
Look at the filter surface and the intake grille every few weeks.
Seasonal Changes
Increase checks during pollen and smoke seasons.
Buying Spares
Buy from reputable sellers and check part numbers.
Before You Begin
Unplug the unit. Have the new filter, the manual or model number, and a bin bag ready. Work on a surface you can wipe, since removing an old filter releases dust. If the unit has a UV lamp, note that it should be off and cool. Most filter changes take five minutes once you know where the door is.
A photo of the old filter in place before you remove it saves guessing about orientation later.
Step by Step
- Open the filter door or remove the rear cover; most release with a tab, a quarter-turn, or by pulling the cover from the bottom
- Note the orientation of the old filter and any arrow or labelled side
- Lift the old filter out by its frame and bag it immediately
- Vacuum loose dust from the compartment with a brush attachment
- Unwrap the new filter completely, including any film over the carbon layer and any cardboard insert
- Insert it in the same orientation, seated flush on all sides
- Refit the door until it clicks, plug in, and reset the filter indicator if the unit has one
If the door will not close easily, the filter is backwards or not fully seated; do not force it.
Orientation and Airflow Direction
Air normally flows from the pre-filter through the carbon layer and then through the HEPA, or in the order the manufacturer specifies. The filter usually has an arrow showing airflow direction or a labelled side that should face outward. Installing it backwards puts the HEPA in front of the carbon, which loads the HEPA with large dust and shortens its life, or prevents the door closing at all.
Multi-Stage Units
Units with separate pre-filter, carbon, and HEPA stages must be reassembled in the correct order. Lay the stages out in sequence before installing and check the manual’s diagram. Washable pre-filters should be dry before reinstalling. Some units have two filters, one on each side; replace both at the same time to keep airflow balanced.
Resetting the Indicator
Most units need the filter light reset manually after a change: hold the reset or filter button for several seconds with the unit on until the light goes out or flashes. Some models use a button combination or an app. If the light returns immediately, the reset did not register; check the manual for the exact method and try again with the door fully latched.
Checking Your Work
Run the unit on high for a minute. Airflow at the outlet should be noticeably stronger than with the old filter. Listen for whistles, which mean a gap, and rattles, which mean something loose. A faint new-filter smell is normal for a day. Write the date on the filter frame and set a reminder for the next check.
Common Mistakes
Leaving the plastic film on, installing the filter backwards, forgetting to replace the pre-filter in front of the HEPA, not resetting the indicator, and using a compatible filter that is slightly the wrong size are the usual errors. Each either stops the unit cleaning or lets air bypass the filter, so a careful first installation is worth the extra minute.
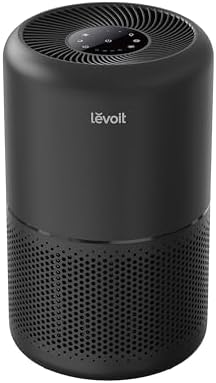
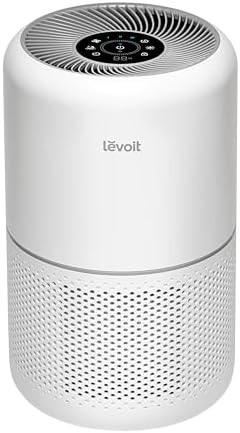
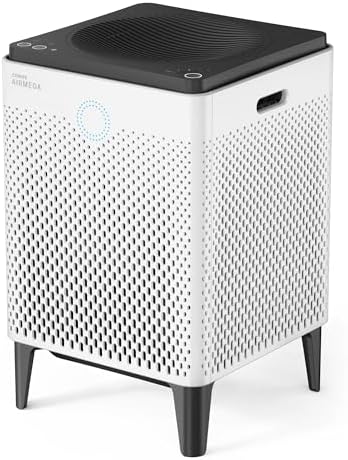
Air Purifiers With Easy Filter Replacement
These picks come from the Hostinger affiliate plugin. Specs change by model year, so confirm filter type, CADR, noise and replacement filter costs on the product page.



Prepare
Switch off and unplug the unit. Have the manual and new filter ready and wash your hands.
Remove the Old Filter
Open the cover or back panel, remove the old filter gently and note its order and orientation.
Unwrap the New Filter
Remove all plastic wrap and stickers that are not meant to stay on. Check the filter model number.
Insert and Seat
Insert the filter following arrows or labels, make sure it sits flat and the edges seal.
Close and Reset
Close the cover until it clicks, plug in the unit and reset the filter indicator if applicable.
Pre-Filter and HEPA Order
Many units place the pre-filter outside and HEPA and carbon inside. Check the manual.
Orientation Arrows
Arrows often show airflow direction. Follow them.
Disposal of Old Filters
Handle used filters gently and dispose as advised. Wash hands.
Testing After Install
Run the unit and listen for odd noises or air leaks.
Keeping Records
Note the installation date and set a reminder.
How to Choose
- Easy access panels
- Clear diagrams
- Available replacement filters
- Filter indicators
Do
- Match the unit’s rated coverage to your room first
- Run it consistently, not only when the air feels bad
- Leave space around the unit for airflow
- Replace filters on the maker’s schedule
Don’t
- Do not buy on looks or price alone
- Do not block the intake or exhaust
- Do not skip filter changes
- Do not expect a purifier to fix every source of pollution
Honest Limits
- This guide uses manufacturer information and public guidance from the EPA and AHAM, not our own lab tests.
- Features and room ratings change between model years, so confirm on the listing before you buy.
- A purifier is not a medical device and does not replace medical advice or treatment.
Who Should Skip This
When to See a Professional
Frequently Asked Questions
Which side faces out?
Follow the arrows in the manual.
Do I need to reset?
Many units do.
Can I run it without the cover?
No.
What if it will not fit?
Check the model and contact support.
Bottom Line
Unplug, remove packaging, match order and orientation, seat the filter flat, close the cover and reset the indicator. Do not force a filter that does not fit.
Related reading: sens,fan,bed
Sources: EPA, Guide to Air Cleaners in the Home; AHAM Verifide.