Last updated:
Disclosure: As an Amazon Associate we earn from qualifying purchases. This does not change what we recommend. See our affiliate disclaimer.
The best filter in the world does nothing if it never gets changed. Many purifiers end up with neglected filters not because owners are careless but because changing them is awkward: stiff latches, multiple layers, hidden screws, unclear instructions or filters that are hard to buy. A design that makes replacement quick and obvious is one of the most practical features you can look for.
This guide explains what makes filter replacement easy or hard, what to check before buying and how to build a simple routine. We have not tested these products ourselves, and designs change, so check the manual and product page for the model you are considering.
Easy replacement looks like
- A door or panel that opens without tools
- A single cartridge or clearly marked parts
- Clear instructions and available spares
Warning signs
- Screws or tools required
- Several separate layers with no guide
- Filters that are hard to find
Key Takeaways
- A filter that is easy to change is a filter that gets changed on time.
- Check access, orientation marks, packaging and instructions before you buy.
- Confirm the replacement part number and where to buy it.
- Keep a spare and note the install date.
What to Look for in the Manual and on the Product Page
Before buying, read the manual if it is available online. Look for pictures of the filter replacement steps, a parts list with part numbers and a section on resetting the indicator. Check how many separate parts there are, whether the pre-filter is washable and whether the filter is a single cartridge. Look at the replacement interval for each part.
Check the retail listing for a replacement filter and its price, and see if it is sold in multi-packs. Read comments from owners about how simple or awkward the job is, remembering that experiences vary. If the manual or product page is unclear, contact the maker with your questions before you buy. A few minutes of research can save you months of frustration.
Storing and Disposing of Filters
Store spare filters in their original sealed packaging in a dry, odor-free place. Do not leave them in a garage or a damp basement, where they can absorb moisture and odors. When you remove a used filter, put it straight into a bag, tie it and dispose of it with household trash unless local rules say otherwise. Some makers have recycling programs; check their sites.
Wash your hands after handling used filters, especially after a smoke event or if the household includes allergy sufferers. Wipe the inside of the unit with a dry or slightly damp cloth while the filter is out, let it dry and then install the new filter. This small step keeps the interior clean and the new filter performing at its best.
When a Complex Design Is Worth It
Some complexity is worth accepting. Separate HEPA and carbon layers let you replace the carbon more often, which is valuable if you have strong odors or smoke exposure. A modular design may allow you to replace only the part that is spent, which can lower costs over time. A tool-free but multi-part design with clear labels can be perfectly manageable.
The key is that the benefits justify the effort and that you will actually do it. If you know you tend to neglect chores, a simple one-cartridge design will serve you better. If you like to optimize and are comfortable with a few steps, a modular design can be a good fit. Whichever you choose, set reminders, keep spares and follow the manual. Confirm replacement details on the current product page before you buy.
Quick Pre-Purchase Checklist
Does the filter come out without tools? Is the orientation clear? How many parts need replacing, and how often? Is the replacement part widely available, and what does it cost per year? Does the unit have an indicator, and how is it reset? Can you find clear instructions or a video from the maker? Is there a washable pre-filter that reduces replacements?
If you can answer yes or give a clear answer to most of these, you are likely looking at a unit that will be easy to live with. If many are unclear, consider another model. Remember that cleaner air depends on filters being fresh, so make upkeep as easy as possible.
Air Purifiers to Compare
The table below lists purifiers from our affiliate partner. Check the manual or product page for how each filter is accessed and what the replacement costs.
Availability and Compatibility
Easy installation means little if you cannot find the filter. Check the model number and the replacement part number, and confirm that the part is sold by the manufacturer or reputable retailers. Be wary of unclear compatibility claims for third-party filters.
Keep a spare so that replacement does not wait for shipping. Note the part number in your phone or on the unit.
Easy vs Complex at a Glance
The table below summarizes the comparison.
| Factor | Easy replacement | Complex replacement |
|---|---|---|
| Tools | None | May need screwdriver |
| Time | About a minute | Several minutes or more |
| Risk of neglect | Low | High |
| Layers | Often one cartridge | Often several parts |
| Best for | Most households | Users who want separate layers |
What Makes Replacement Easy
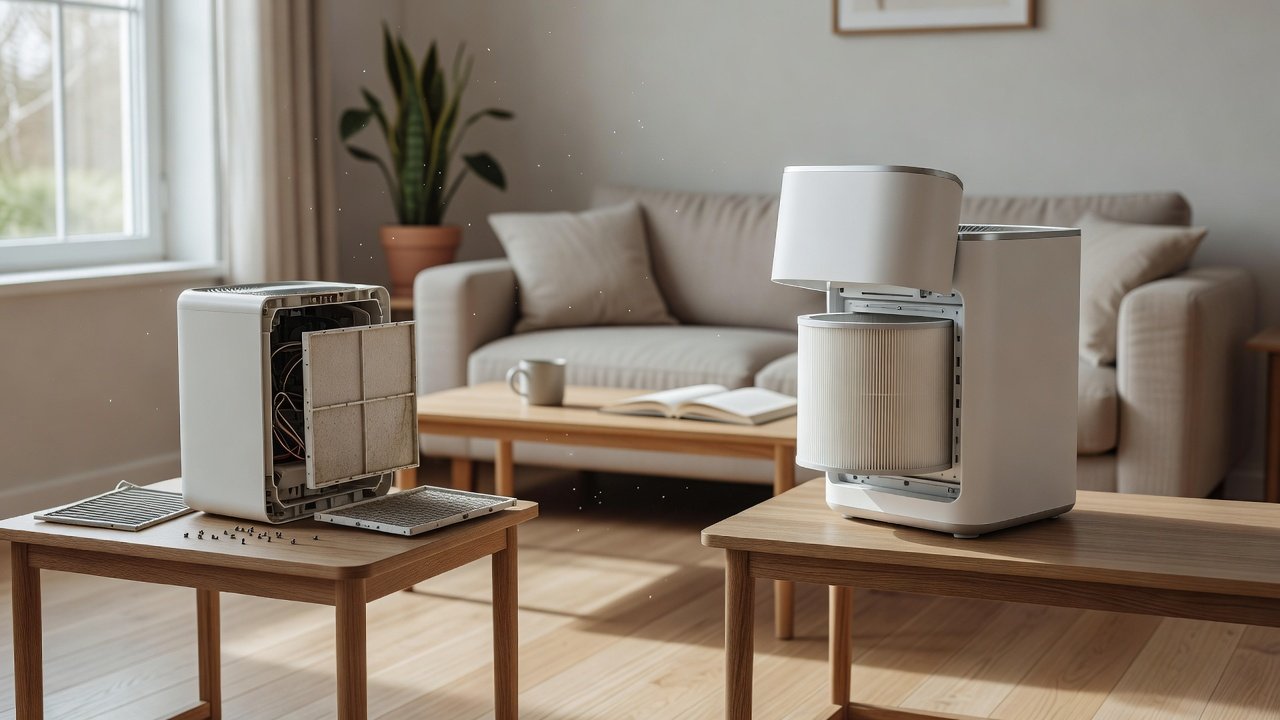
The easiest designs have a front, rear or bottom panel that opens with a latch or twist, a filter that slides out and a clear arrow or label showing orientation. A single combined cartridge can be swapped in a minute. Handles on the filter help. The manual should show the steps with pictures, and the unit should signal when the filter is installed correctly.
Also consider packaging: filters that arrive sealed with clear instructions are easier to use than ones that need to be unwrapped and assembled.
What Makes It Complicated
Complicated designs may require removing screws, lifting off covers with hidden clips, separating several filter layers or resetting a sensor in a menu. Some units place the filter at the bottom so you must tip the whole unit. Others use filters that need to be cut or assembled to fit.
Complexity is not always bad if it comes with a benefit, such as separate carbon and HEPA layers that can be replaced on different schedules. But it raises the chance that maintenance gets postponed.
The Step-by-Step of a Typical Swap
A typical swap goes like this. Switch the unit off and unplug it. Open the panel as the manual describes, which may be a latch, a twist or a magnet. Slide out the old filter, noting its orientation. Remove any plastic wrap from the new filter, because forgetting this is a common mistake that blocks airflow entirely. Insert the new filter in the same orientation, close the panel, plug in and reset the filter indicator.
The whole process takes about a minute with a good design. If your unit has a pre-filter, clean or replace it at the same time. Write the date on the new filter. Put the old filter in a bag before disposing of it to avoid spreading dust.
Common Mistakes When Replacing Filters
The most common mistake is leaving the plastic bag on the new filter. Another is installing the filter backwards, which can reduce performance, so follow the arrows. A third is forgetting to reset the indicator, so the light stays on and loses its meaning. A fourth is using the wrong filter because it looks similar, and a fifth is not seating the filter properly, which creates gaps that let air bypass.
Take a moment after installing to check that the panel closes snugly and that the unit runs normally. If you hear whistling or rattling, reopen the panel and recheck the filter fit.
Designing Your Own Routine
A simple routine is better than perfect intentions. Pick a date each month for a check, such as the first Saturday. Check the pre-filter, look at the main filter and note airflow and odors. Record the replacement date in your calendar. When the filter is near its listed life, order a replacement in advance.
Keep a small box near the unit with the manual, spare filters and a pen. This turns upkeep into a two-minute task and prevents the all-too-common situation of discovering a clogged filter months late.
Households Where Simplicity Matters Most
If the purifier is in a household with older family members, children or anyone with limited dexterity, favor a design that requires minimal force and no tools. Large, clearly shaped handles and bright labels help. If you travel often or rent, favor a lightweight unit with a simple panel.
If you have allergies and want to avoid handling dusty filters, consider wearing a mask and gloves, or asking someone else. Open the panel gently and avoid shaking the filter indoors.
Balancing Simplicity and Performance
An easy-to-open unit is not automatically better at cleaning, so do not choose on convenience alone. First meet your CADR target, filter quality and noise needs. Then use ease of replacement as a tiebreaker or a strong factor if you know you tend to neglect maintenance.
Confirm the details on the product page and in the manual, including the filter type and replacement interval.
How to Choose
- Look for tool-free filter access.
- Check the replacement part number and availability.
- Prefer clear instructions and indicators.
- Keep a spare filter.
- Avoid ozone generating or ionizer modes; the EPA advises against ozone-emitting air cleaners.
Do
- Match the unit’s rated coverage to your room first
- Run it consistently, not only when the air feels bad
- Leave space around the unit for airflow
- Replace filters on the maker’s schedule
Don’t
- Do not buy on looks or price alone
- Do not block the intake or exhaust
- Do not skip filter changes
- Do not expect a purifier to fix every source of pollution
Honest Limits
- This guide uses manufacturer information and public guidance from the EPA and AHAM, not our own lab tests.
- Features and room ratings change between model years, so confirm on the listing before you buy.
- A purifier is not a medical device and does not replace medical advice or treatment.
Who Should Skip This
When to See a Professional
Choose the unit you will actually maintain, then keep a spare filter handy.
Frequently Asked Questions
How do I know which filter to buy?
Use the exact model number and the replacement part number in the manual.
Do I need tools to change the filter?
Many units need none, but some require a screwdriver. Check before buying.
What is the most common mistake?
Leaving the plastic wrap on the new filter.
Do I need to reset the indicator?
Yes, usually by holding a button for a few seconds.
Can I install the filter backwards?
It can reduce performance. Follow the arrows or labels.
How often should I check?
Every month or two, and sooner after smoke or dust.
Should I keep a spare?
Yes, especially before smoke or pollen season.
What if the filter is hard to find?
Check availability before buying the purifier.
Are complex designs bad?
Not always, but they raise the chance of delayed maintenance.
Where do I confirm details?
On the product page and in the manual.
Bottom Line
A filter that is easy to replace is a filter that gets replaced, so design matters as much as filter quality.
Check access, part availability and instructions, and confirm specifications on the product page.
Related reading: sens,fan,bed
Sources: EPA, Guide to Air Cleaners in the Home; AHAM Verifide.