
Last updated:
As an Amazon Associate we earn from qualifying purchases. This does not change what we recommend. See our affiliate disclaimer.
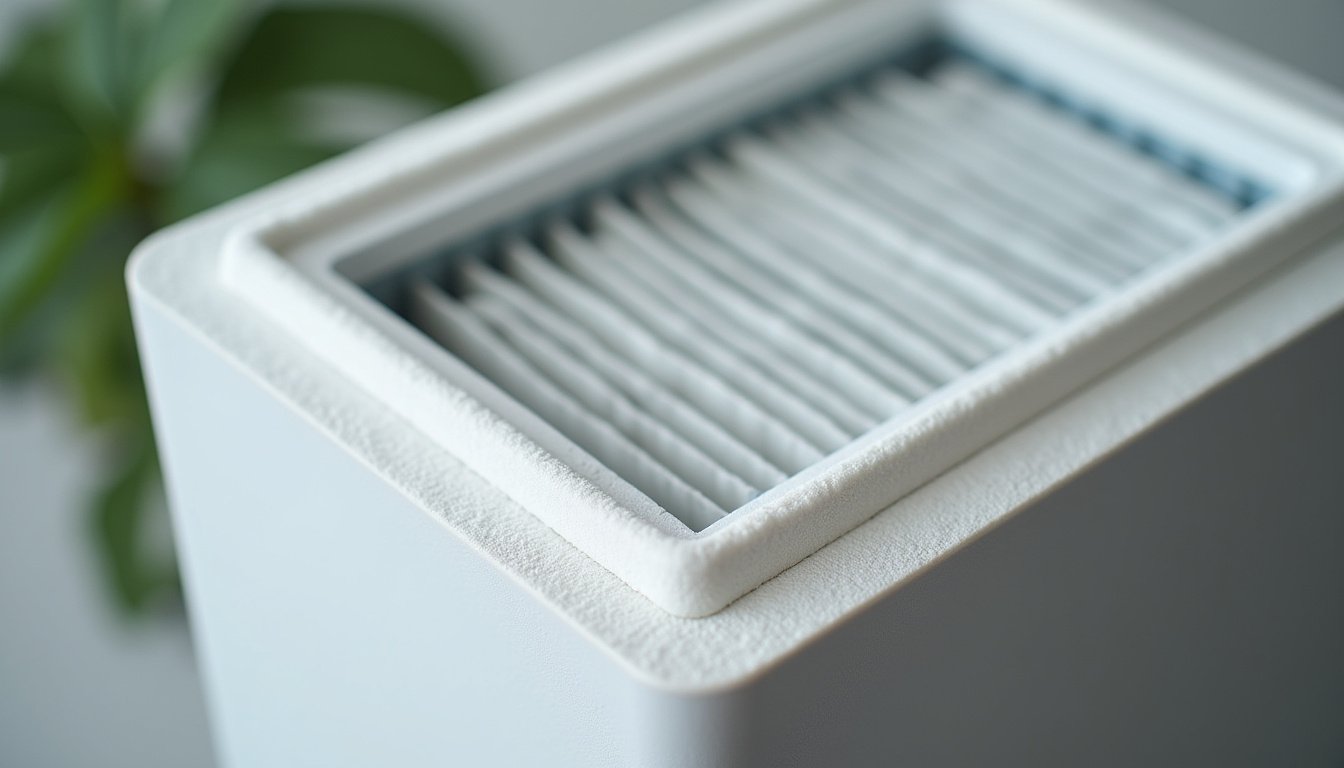
Hold a hand near the seam of a running purifier and feel a breeze where there should be none, or open the filter door and find dust on the side of the filter that is supposed to be clean. Both mean the same thing: air is finding a way around the filter instead of through it. The fan is working, the filter is fine, and the room is barely cleaner than before.
An air purifier leaks air when the path around the filter is easier than the path through it. HEPA media resists airflow, so even a small gap at a gasket, a cover seam, a filter frame or a cracked housing lets a disproportionate share of air escape unfiltered. The usual causes are a filter that is not seated against its gasket, a replacement filter that is slightly undersized, a worn, missing or displaced gasket, a cover or door that is not latched flat, a pre-filter frame holding the main filter off its seal, or a crack in the housing from a fall. The fix in nearly every case is to reseat the filter correctly, replace a poor-fit filter with the exact part, restore the gasket and latch the cover until it clicks.
In short: find where the air escapes, confirm the filter is the right part and seated against an intact gasket, latch the cover flat, and leave structural damage to the maker.
The EPA’s guide to air cleaners in the home notes that a portable cleaner’s performance depends on the filter being properly installed and sealed, since any air bypassing the filter is not cleaned. Maker manuals describe the gasket, orientation and latching for each model, and that description is the standard a leak check should meet.
This guide is research-based, drawn from maker manuals, the mechanics of filter housings and EPA guidance. We have not tested the units in the comparison table and quote no prices or ratings. Nothing here involves opening the unit beyond the filter compartment; cracked housings and loose panels beyond that are the maker’s job.
A quick fix if
- The filter is a near-fit replacement or installed backwards
- The gasket is dislodged but intact
- The cover is not pushed home or a clip is unlocked
- A pre-filter frame is holding the main filter off its seal
Contact the maker if
- The gasket is torn, compressed flat or missing and not sold separately
- The housing or cover is cracked
- Panels beyond the filter compartment are loose
- A genuine filter, correctly seated, still shows dust on the clean side
Key Takeaways
- HEPA media resists airflow, so even a small gap around the filter carries a large share of the air unfiltered.
- Dust on the clean side of the filter, or on the fan and outlet, is the clearest sign of bypass.
- The exact filter for the model, seated flush against an intact gasket, is the whole seal; near-fit filters leak.
- A cover that is not latched flat, or a pre-filter frame in the wrong position, lifts the filter off its seal.
- Some vents near the motor or sensor are intentional and are not leaks.
- Tape, foam strips and glue hide bypass, can block cooling, and are not repairs.
- Cracked housings, torn gaskets and loose panels are maker parts, not home fixes.
Purifiers With Well-Sealed Filter Bays to Compare
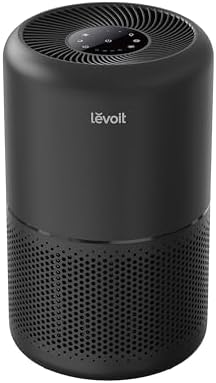
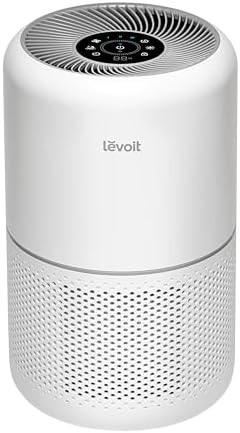
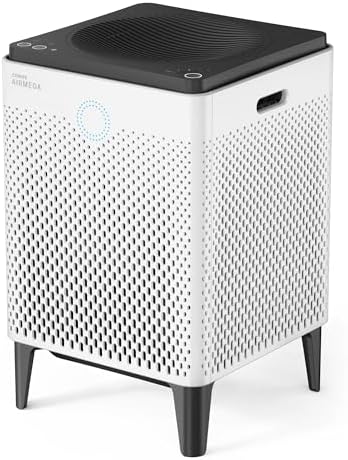
If a leaky housing has you looking at a replacement, these widely reviewed filter-based units use gasketed filter compartments with clearly labeled orientation and widely available genuine filters. Compare the maker-listed CADR against your room and favor models whose filters are stocked by more than one seller.



How This Guide Approaches Leaks
We listed the places air can bypass a filter in common housing designs, cylindrical, panel and drawer, matched each to the signs it leaves, and ordered the fixes from most to least likely. Everything stays within the filter compartment. Product details in the table come from maker specifications.
The physics is simple and worth holding onto: air takes the path of least resistance. A dense filter is high resistance; any gap is low resistance; air floods the gap.
Why a Small Gap Is a Big Leak
A true HEPA filter captures 99.97 percent of particles at 0.3 microns under test conditions, and it does that by forcing air through a dense mat of fibers. Pushing air through that mat takes pressure, which the fan supplies. Offer the same air a gap of a few millimeters around the frame and a large fraction of it will take the gap, because nothing is resisting it there. A unit with a visible gap can be moving most of its air around the filter rather than through it.
That is why fit and sealing get as much attention in this guide as filter grade. A sealed HEPA-type filter can outperform a leaking true HEPA filter in a real room, and a correctly sealed true HEPA filter is what the CADR rating assumes.
| Where air escapes | Share of airflow likely bypassing | What you notice |
|---|---|---|
| Correctly seated filter, intact gasket | Negligible | Clean side stays white; steady results |
| Filter slightly undersized, gap at one edge | Significant | Dust streak on the clean side at that edge; results fade |
| Gasket displaced or missing on one side | Significant | Dust along one edge; breeze at the seam |
| Cover not latched flat | Significant | Rattle; breeze at the cover seam |
| Filter installed backwards, frame on the tabs | Large | Visible gap; cover may not close |
| Housing cracked | Varies | Breeze from an unexpected spot; dust inside the fan bay |
Finding the Leak
- Unplug the unit and open the filter compartment.
- Look at the filter’s downstream face, the side toward the fan. A new filter is white there; gray streaks or patches mean air and dust are getting past it, and their location points to the gap.
- Check the fan blades and outlet grille for dust; a dusty fan means bypass has been going on for a while.
- Inspect the gasket, usually a foam or rubber strip around the filter bay or on the filter frame, for gaps, tears, flattened sections or pieces that have come loose.
- Refit the filter and cover, plug in, run on high, and pass the back of a hand or a tissue slowly around every seam: cover edges, filter door, housing joints. A breeze or fluttering tissue marks a leak.
- Note any vents near the motor or sensor that blow a little air; check the manual, since some are intentional.
Cause 1: The Filter Does Not Fit
The most common leak is a replacement filter that is slightly smaller than the original. Makers often have several similar filters across a range; third-party filters vary more and some are deliberately undersized to fit several models. A filter a few millimeters short in height or diameter cannot be pressed against the gasket all the way around, and the gap it leaves is exactly where the air goes.
Compare the designation on the old filter frame with the new one and the manual, and measure if in doubt. If the replacement is wrong, return it; do not pad the gap. Even genuine filters can leak if installed backwards or upside down, since the frame then rests on tabs instead of between them. Find the arrow, label, tab or open end and orient it as the manual shows.
Cause 2: The Gasket Is Damaged or Displaced
The gasket is the soft strip the filter frame presses against to make the seal. On some units it is on the housing; on others it is the foam edge of the filter itself. Gaskets get pushed out of their channel during filter changes, tear when a filter is forced, flatten with age so they no longer spring back, and occasionally are missing because the previous owner or a prior filter change dislodged them.
| Gasket condition | Sign | Fix |
|---|---|---|
| Dislodged but intact | Loose strip in the bay; gap on one side | Press it back into its channel; some are adhesive-backed |
| Compressed flat | Filter seats but tissue test shows a breeze all around | Maker replacement gasket or housing part |
| Torn or chunk missing | Visible gap in the strip | Maker part; do not substitute weatherstrip |
| On the filter frame, worn | Genuine filter frame foam looks crushed | New genuine filter |
| Missing entirely | Hard plastic meets hard plastic | Maker part; check whether the filter itself carries the gasket |
Hardware store foam weatherstrip is a tempting substitute and is not appropriate: wrong thickness changes how the filter sits, wrong density compresses differently, and adhesive can foul the bay. Makers sell gaskets or the housing part that carries them.
Cause 3: The Cover or a Frame Is Not Pressing the Filter Home
On most units the cover, door or a snap-on pre-filter frame is what presses the filter against the gasket. A cover not pushed in until it clicks, a latch worn by many changes, a hinge pin out of place, or a cover warped by heat or a fall leaves the filter resting loosely. A pre-filter frame seated on only some of its tabs can wedge the main filter at an angle and hold one edge off the seal.
- Close the cover with the filter removed; if it does not latch flat and click, the cover or latch is the issue regardless of the filter.
- Refit any clips, bars or pre-filter frame in the order the manual shows and confirm each is locked, not just resting.
- Check that only one pre-filter is installed; a doubled pre-filter changes the thickness the cover expects.
- Confirm the filter’s shipping plastic and inserts are off; they also change thickness.
- Press the cover at the latch points until it clicks, then run the tissue test along its edges.
Worked example: a panel unit began leaving a gray streak along the bottom of the clean side. The owner found the pre-filter frame had been clipped in on three tabs after a cleaning, leaving the fourth corner loose; the main filter sat a few millimeters off its gasket at that corner. Reseating the frame on all four tabs ended the streak.
Cause 4: Cracks and Damaged Housings
A unit that has been dropped, knocked off a shelf or left near a heater can crack along a seam or around the filter bay. Cracks let air escape before it reaches the filter or after it leaves, and a cracked bay rim can no longer hold the gasket. Tape and glue are not fixes here; the housing is structural and often carries the safety switch for the cover.
Contact the maker. Covers and some housing parts are sold or supplied under warranty; a deeply cracked main housing usually means the unit is at the end of its life. Do not run a unit whose cover switch no longer stops the fan when the cover is off.
Vents That Are Not Leaks
Not every breeze is bypass. Many units have small vents near the motor for cooling, a slot where the particle sensor draws its sample, or a secondary outlet that spreads airflow. These are intentional, carry little air and sit downstream of the filter or outside the filtered path entirely. The manual’s diagram will show them. If the tissue test finds a gentle, steady flow at a labeled vent and the filter’s clean side is white, there is no problem to fix.
After the Fix
Once the filter is seated against an intact gasket and the cover is latched, clean up the evidence so you can tell if the leak returns. Wipe the fan blades you can reach from the filter bay and the outlet grille with a damp cloth, unplugged. If the clean side of the filter is heavily grayed, the filter has been working at reduced effect for a while; it will still capture, but if it is near its interval anyway, replace it so the next check starts from white.
Run the unit for a week and look at the clean side again. White means sealed. A fresh gray streak means the leak is still there or has moved, and the check starts over at the filter fit and gasket.
| Check after fixing | What you want to see | If not |
|---|---|---|
| Clean side of filter after a week | Still white | Leak persists; recheck fit, gasket, cover |
| Tissue test at seams | No flutter | Find the moving seam; relatch or maker part |
| Fan and outlet | Staying clean | Dust means bypass continues |
| PM2.5 monitor in a closed room | Clear drop within an hour | Bypass, undersizing or open door |
How to Fix a Leaking Purifier in 6 Steps
- Unplug, open the filter bay and inspect the clean side of the filter for gray streaks; note where they are.
- Confirm the filter is the exact part for the model, fully unwrapped and oriented as the manual shows.
- Inspect the gasket; press a dislodged strip back into its channel, and order the maker’s part for a torn, flattened or missing one.
- Refit clips, bars and the pre-filter frame on every tab, one pre-filter only, and seat the filter flush.
- Latch the cover until it clicks and check it sits flat; test it empty if it will not.
- Run on high and tissue-test every seam; if a correctly seated genuine filter still leaks, contact the maker about the gasket, cover or housing.
Do and Do Not
Do
- Use the exact filter and orient it correctly.
- Keep the gasket in its channel and intact.
- Latch the cover until it clicks.
- Tissue-test seams after any filter change.
- Check the clean side of the filter at each inspection.
Do not
- Do not pad gaps with foam, tape or cloth.
- Do not substitute hardware store weatherstrip for a gasket.
- Do not force a warped cover closed.
- Do not run a unit with a cracked housing or a bypassed cover switch.
- Do not confuse labeled cooling or sensor vents with leaks.
Who Should Skip This
If the breeze you feel comes from a small labeled vent near the motor or sensor and the clean side of the filter is white, skip the troubleshooting; that vent is intentional and the unit is sealed where it matters.
If the housing is cracked or the cover will not latch with the filter removed, skip the filter checks and contact the maker. Those are parts or warranty matters, and a unit whose cover switch no longer works should not be run.
Honest Limits
- Housing designs differ; the manual’s diagram and gasket location override general guidance.
- A sealed filter still cleans only the room it is in while running; sealing fixes bypass, not sizing.
- Third-party filters may fit the bay yet seal poorly; the clean side of the filter is the real test.
- Gaskets, covers and housings are maker parts; improvised seals compromise safety and airflow.
- Some dust on the fan can come from startup before the filter was installed; judge by fresh gray streaks.
- Nothing here applies to internal components, which are not owner serviceable.
When to See a Professional
Contact the maker for a torn, flattened or missing gasket that is not sold separately, a cracked cover or housing, loose panels beyond the filter compartment, a cover switch that no longer stops the fan, or any burning smell or sparking; stop using the unit for the safety symptoms.
See a doctor or allergist if symptoms persist in a room where a correctly sealed and sized purifier is running; the trigger may not be airborne. Nothing on this page is medical advice.
Frequently Asked Questions
Why is air coming out around the edges of my purifier?
Air is bypassing the filter because the path around it is easier than the path through dense HEPA media. The usual causes are a filter not seated against its gasket, a near-fit replacement, a dislodged or worn gasket, or a cover that is not latched flat. Reseat, fit the exact part and latch the cover.
How can I tell if my purifier filter is leaking?
Look at the downstream, clean side of the filter: gray streaks or patches mean dust is getting past it, and their position points to the gap. Dust on the fan blades or outlet grille confirms it. With the unit running on high, a tissue held near seams flutters toward any leak.
Does a small gap around the filter really matter?
Yes. HEPA media resists airflow, so even a few millimeters of gap carries a large share of the air unfiltered. A unit with a visible gap can be moving most of its air around the filter, leaving the room barely cleaner while the fan runs normally.
Can I seal the gap with foam tape or weatherstrip?
No. Padding changes how the filter sits, hides the remaining bypass, can be drawn into the fan and may block cooling or sensor vents. A filter that needs padding is the wrong filter; fit the exact part, and order the maker’s gasket or housing part if the original is damaged.
Where is the gasket on an air purifier?
Either a foam or rubber strip around the rim of the filter bay on the housing, or a foam edge bonded to the filter frame itself, depending on the model. The manual’s diagram shows which. It must be intact and in its channel for the filter to seal.
Why does the cover not seal even with the right filter?
The cover may not be pushed in until it clicks, its latch may be worn, a hinge pin may be out, or the cover may be warped. Test it with the filter removed: if it will not latch flat and click empty, the cover or latch is the problem and the maker’s part fixes it.
Is the air blowing from the slot near the sensor a leak?
Usually not. Many units have small intentional vents for motor cooling, a sensor sampling slot or a secondary outlet, all shown in the manual. If the clean side of the filter stays white and the flow is at a labeled vent, it is normal and needs no fix.
Can a third-party filter cause air leaks?
Yes, if it is slightly undersized, thinner, or has a different frame or gasket. Some are made to fit several models and seal none of them well. If you use one, confirm it is labeled for the exact model and watch the clean side of the filter for gray streaks after a week.
What if my purifier housing is cracked?
Stop using it if the crack affects the cover switch or the filter bay, and contact the maker. Covers and some housing parts are available; a deeply cracked main housing usually ends the unit’s life. Tape and glue are not repairs for a structural, mains-powered appliance.
How do I check that the fix worked?
Wipe the fan and outlet, refit everything, run the unit for a week and look at the clean side of the filter again. White means sealed; a fresh gray streak means the leak persists. A PM2.5 monitor in a closed room should also show a clear drop within an hour.
Bottom Line
An air purifier leaking air is a purifier whose filter is being bypassed, and the evidence is a breeze at a seam and gray dust on the side of the filter that should stay white. The causes are ordinary: a near-fit filter, a backwards install, a dislodged gasket, a pre-filter frame on three tabs instead of four, a cover not latched flat. Each is a minute’s fix with the right part and no tools.
Do it properly. Use the exact filter, seat it flush against an intact gasket, latch the cover until it clicks and tissue-test the seams. Leave padding, weatherstrip and glue in the drawer, hand cracked housings and worn gaskets to the maker, and check the clean side of the filter a week later to prove the room is finally getting filtered air.
Related reading: Air purifier filter falling out, Why isn’t my air purifier working, Air purifier replacement parts.